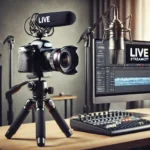
If you’re serious about live streaming, excellent audio quality should be at the top of your list. While stunning visuals can grab attention, it’s crystal-clear audio that keeps your audience engaged. Poor sound can frustrate viewers and diminish your stream’s professionalism. Here are expert tips to help you achieve great audio in live streaming and deliver an exceptional experience for your audience.
Choose the Right Microphone
The quality of your microphone plays a significant role in audio clarity. Built-in microphones on webcams or laptops often lack the fidelity needed for professional-level streams. Invest in a good-quality external microphone that’s suited to your specific streaming needs. Some popular options include:
- Dynamic Microphones: Great for reducing background noise, ideal if you’re streaming in noisy environments.
- Condenser Microphones: Excellent for capturing detailed sound, perfect for controlled settings like home studios.
- Lavalier Microphones: Perfect for hands-free operation, especially useful for tutorials or presentations.
Optimize Your Environment for Sound
Where you stream has a huge impact on audio quality. External noises, echoes, and other distractions can ruin the experience for your audience. Take these steps to create an acoustically friendly setup:
- Minimize Background Noise: Stream in a quiet location away from noisy appliances, street traffic, or other disturbances.
- Control Echo: Use curtains, rugs, or foam panels to reduce sound reflections in your room.
- Close Doors and Windows: Limit outside interruptions by sealing off your streaming space.
Use an Audio Interface or Mixer
If you’re using a high-end microphone or multiple audio inputs, consider an audio interface or a mixer. These tools help you fine-tune sound levels, reduce distortion, and improve overall audio quality. A mixer is particularly useful for podcasts or collaborative streams where multiple speakers need individual audio adjustments.
Leverage Noise Reduction Tools
Live streaming doesn’t always happen in perfect conditions. Thankfully, noise reduction technologies can help filter unwanted sounds. Many live streaming software platforms (like OBS and Streamlabs) have built-in noise suppression filters. Alternatively, external software tools like Krisp or hardware units with noise gates can enhance your live audio considerably.
Monitor Your Levels
Audio levels that are too low can be hard to hear, while levels that are too high can cause distortion and clipping. Use visual level monitors within your recording or streaming software to ensure your levels stay in an optimal range. Aim for consistent volume without abrupt peaks or valleys.
Use a Pop Filter or Windscreen
Plosive sounds from letters like “P” and “B” can result in unpleasant audio spikes. To prevent this, use a pop filter for your microphone. Additionally, if you’re streaming outdoors or in a windy environment, a windscreen can minimize wind interference and improve sound clarity.
Test Audio Before Going Live
Always do a test run before starting your live stream. Verify that your microphone is working, your software is capturing audio correctly, and all settings are optimized. Use headphones to listen to your test audio and identify any issues with background noise, volume levels, or clarity.
Adjust Stream Settings
Most live streaming platforms provide audio settings that can be customized for better performance. Some key adjustments include:
- Sample Rate: Stick to standard settings like 44.1 kHz or 48 kHz for good sound quality.
- Bitrate: Ensure your audio bitrate is adequately set (96kbps for voice, 128kbps or higher for music).
- Compression and EQ: Adjust compression to avoid sudden volume changes and equalize (EQ) to balance frequencies for a richer sound.
Use Headphones While Streaming
Wearing headphones during your live stream prevents echo and feedback issues caused by microphone and speaker interference. Headphones also help in monitoring how you sound to your audience, allowing for real-time corrections if needed.
Stay Consistent With Distance From the Microphone
Maintaining a consistent distance from your microphone ensures even audio levels throughout your stream. Keep the microphone 6-12 inches away from your mouth and speak directly into it for optimal results. Experiment with placement to find the sweet spot.
Backup Your Audio
Even in live streaming, it’s wise to have a fail-safe. Use backup software or hardware to record your audio separately during the stream. This backup can save crucial content in case of technical issues and can also be repurposed for post-stream edits or highlights.
Solicit Feedback
Finally, engage with your audience and ask for their feedback on audio quality. They may notice issues you didn’t catch during your test runs. Use their input to refine your setup and deliver a better experience in future streams.
By implementing these tips, you’ll be well on your way to achieving stellar audio quality for your live streams. Remember, great sound isn’t just a technical upgrade—it’s an essential part of building credibility and delivering value to your viewers.
