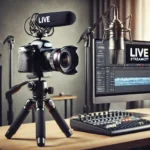
Understanding the Importance of Recording Live Streams
Live streaming is an exceptional way to connect with your audience, but often, the impact of your streams doesn’t have to end when the broadcast does. Recording your streams ensures that your hard work can be repurposed, reposted, or revisited by viewers who may have missed the live airing. Whether you’re a gamer, educator, or entrepreneur hosting webinars, preserving your streams can amplify your content’s reach and value.
Tools You’ll Need to Record Live Streams
Before diving into the recording process, it’s important to gather the right tools. Here’s a quick list of items you’ll need:
- Reliable Internet Connection: Essential for live streaming and ensuring a smooth recording.
- Streaming Software: Popular options include OBS Studio, Streamlabs OBS, XSplit, and vMix. Most of these allow built-in recording functionality.
- Sufficient Storage Space: Ensure you have enough storage on your device or external drives to save the recordings.
- Good Hardware: Invest in a computer or device capable of handling live streaming and recording simultaneously.
- Microphone and Camera: High-quality recordings demand clear audio and video.
Step-By-Step Guide to Recording Live Streams
Follow this step-by-step guide to successfully record your live streams:
1. Choose the Right Software
The first step to recording your live streams is picking software that supports both streaming and recording. Many streaming platforms, such as Twitch, YouTube Live, or Facebook Live, provide integrated recording options, but these might not offer high customizability. If you want more control over output formats, resolution, and more, third-party software like OBS Studio or Streamlabs OBS is your best bet.
2. Configure Your Streaming and Recording Settings
Once you’ve selected your software, it’s time to configure your recording settings. Most tools allow you to adjust parameters like resolution, frame rate, and recording format (e.g., MP4, FLV). For optimal quality, record at 1080p (Full HD) with a frame rate of 30-60 fps. Also, choose a reliable codec like H.264 for better compression and high-quality output.
3. Test Everything Before Going Live
Before going live, do a test run. Check your video quality, audio levels, and whether your recording functionality is working as expected. This ensures that everything is in place when you’re streaming and eliminates any surprises during the broadcast.
4. Start Recording During Your Live Stream
Most streaming software has an easy-to-use interface with a “Start Recording” button. Make it a habit to simultaneously start the recording and streaming functions to capture everything seamlessly. Some software even allows you to assign hotkeys for this.
5. Save Your Recording
Once your stream ends, ensure that the file is safely saved to your specified folder or directory. Use clear and descriptive filenames to make managing your content easier. For example, include the date and subject of the stream in the filename (e.g., “2023-10-05-Marketing-Webinar.mp4”).
6. Backup Your Recording
After saving your recording, back it up to a secure location, such as an external hard drive or a cloud storage service like Google Drive, Dropbox, or OneDrive. This ensures your content is protected in case of hardware failure or accidental deletion.
Alternative Ways to Capture Live Streams
If you’re streaming directly on platforms like YouTube or Twitch, these services often provide automatic archival options. For example:
- YouTube Live: Enable the “Automatically archive live streams” feature to save your stream directly to your YouTube channel as a video.
- Twitch: Use the “Video on Demand (VOD)” feature to archive your streams for up to 60 days (depending on your account type).
- Facebook Live: Save your live videos to your page after the broadcast ends by enabling the appropriate setting beforehand.
Tips for High-Quality Live Stream Recordings
Recording your streams is just the beginning. To maximize their usability, follow these tips for ensuring high-quality output:
- Use a Stable Internet Connection: A bad internet connection can lead to dropped frames and lower recording quality.
- Invest in Good Lighting and Audio: High-quality audio and lighting can significantly improve the production value of your streams and recordings.
- Optimize Encoder Settings: Ensure that your encoder (either hardware or software-based) is configured properly for your streaming bitrate and resolution.
- Monitor CPU Usage: Recording and streaming simultaneously can be resource-intensive. Keep an eye on your CPU usage to prevent system lag.
- Edit Your Recordings: Post-editing can help you remove unnecessary sections, improve audio quality, and add captions or graphics. Tools like Adobe Premiere Pro, DaVinci Resolve, or even free options like Shotcut are great for video editing.
Creative Ways to Repurpose Your Recorded Streams
Don’t let your recordings sit idle once the stream ends. Here’s how you can repurpose your content:
- Upload to YouTube: Share your recording with a broader audience on YouTube. Optimize it with SEO-friendly titles and descriptions.
- Create Short Clips: Extract highlights or funny moments to create short clips for platforms like Instagram, TikTok, or Twitter.
- Turn Them Into Tutorials: Edit your streams into educational content for reuse, especially if they involve demonstrations or how-tos.
- Offer Exclusive Downloads: Allow subscribers or followers to download recordings as exclusive content.
- Create a Podcast: If your streams are conversational or educational, convert the audio into a podcast episode.
Conclusion
Recording your live streams is an essential practice for anyone serious about content creation and audience engagement. Not only does it help preserve your hard work, but it also provides opportunities to extend the life of your content. By following the tips and steps outlined in this guide, you can ensure high-quality recordings that can be repurposed for various platforms and formats. Start recording your streams today and watch as your content reaches new heights!
