When live streaming from a remote location, preparation and adaptability are critical to ensuring a successful broadcast. Whether you’re streaming a scenic outdoor event, covering news in real-time, or hosting a virtual meeting, remote streaming comes with unique challenges. These include unstable internet connections, unpredictable environments, and potential technical hiccups. Below, we’ll explore best practices to help you create a professional and polished live stream, even from the most remote areas.
1. Assess Your Location Ahead of Time
Start by scouting your streaming location. If possible, visit the location beforehand to evaluate lighting, ambient noise, and connectivity. Identify potential problem areas, such as spots with poor cell reception or unflattering light sources.
If scouting in advance isn’t an option, arrive early on the day of your broadcast to set up and troubleshoot. Knowing the layout and logistical challenges will help you adapt effectively.
2. Prioritize a Reliable Internet Connection
Internet reliability is key to a smooth live-streaming experience. In remote areas, reliable connectivity can be a challenge. Consider these tips:
- Test Your Cellular Network: If you’re relying on mobile data, test upload speeds to ensure they meet the requirements of your streaming platform.
- Invest in Hotspots: Mobile hotspots, or portable Wi-Fi routers, can provide a backup source of internet.
- Satellite Internet: In extremely remote areas, explore satellite internet options to ensure uninterrupted connectivity.
- Bonding Devices: Cellular bonding technologies, like those offered by Teradek or LiveU, combine multiple networks to improve reliability and speed.
Always run a speed test before streaming. Look for an upload speed of at least 5 Mbps for 720p resolution or 10 Mbps for 1080p.
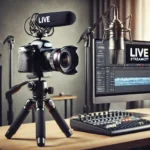
3. Use the Right Gear
The quality of your equipment directly impacts your stream’s success. Here’s what you’ll need:
- Camera: Bring a high-quality camera that suits your streaming needs. Mirrorless or DSLR cameras perform excellently for professional-quality streams.
- Audio Equipment: Invest in external microphones, such as lapel mics or shotgun mics, to ensure clear audio. The built-in microphone on most cameras may not suffice in noisy or windy locations.
- Tripod or Stabilizer: Keep your video steady with a sturdy tripod or a gimbal for mobile setups.
- Lights: For low-light settings, portable LED lighting kits can be a lifesaver.
- Backup Batteries and Power Banks: Always carry extra batteries or a portable power source to avoid interruptions.
4. Plan for the Environment
Remote sites often come with environmental challenges. Here are some tips to prepare for the unexpected:
- Weather: Check the forecast and bring necessary protective gear like waterproof covers for your equipment.
- Lighting: Natural light can change quickly, so be prepared to adjust your camera settings or use supplemental lighting if needed.
- Terrain: Bring ruggedized equipment cases if you’re trekking through rough terrain.
- Ambient Noise: Use directional microphones or windshields to reduce interference from wind or background noise.
5. Run a Test Stream
Before going live, perform a full dry run of your stream. This helps you uncover potential technical issues, such as mismatched audio and video, poor internet connection, or visual artifacts. Check how your stream appears on the platform to ensure it meets your standards.
Platforms like YouTube and Facebook allow you to create private streams for testing. Use this feature to monitor your feed quality, test your equipment, and tweak settings as needed.
6. Leverage Encoding and Streaming Software
Encoding software helps compress your video and ensures compatibility with your streaming platforms. Tools like OBS Studio, Streamlabs, or vMix are popular choices for live streaming. Configure your encoder to optimize for reduced latency and stable playback quality based on your internet speed.
Additionally, learn how to adjust your bitrate dynamically during the stream. Lowering the bitrate can help maintain a smooth broadcast if your internet suddenly slows down.
7. Engage Your Audience
A live stream isn’t just about video quality—it’s also about creating a dynamic and engaging experience for your viewers.
- Use On-Screen Graphics: Display titles, captions, or overlays to provide context or branding.
- Interact in Real-Time: Respond to live comments or questions to build rapport with your audience.
- Share Behind-the-Scenes Content: When appropriate, show candid moments or give viewers a peek behind the camera setup. It adds a personal touch.
8. Have Contingencies in Place
Even with the best planning, things can go wrong. Prepare backup solutions to minimize downtime:
- Backup Equipment: Bring extra cables, SD cards, and microphones.
- Alternate Streaming Platforms: Have a secondary platform ready in case your primary platform experiences issues.
- Pre-Recorded Content: In case of a complete failure, prepare some pre-recorded content to keep viewers engaged while you address the problem.
9. Optimize for Playback
Once your live stream ends, ensure the recorded content is optimized for playback. Add metadata such as titles, descriptions, and tags for SEO purposes. Time-stamp key moments in the recording to make it easier for viewers to revisit specific sections.
10. Analyze and Learn
After your stream, review its performance metrics. Use platform analytics to identify areas for improvement. Common metrics to monitor include:
- Average view duration
- Peak live viewers
- Drop-off points
- Viewer comments and engagement rates
Take what you’ve learned and apply it to future streams to continually improve.
Final Thoughts
Live streaming from a remote location doesn’t have to be intimidating. By planning ahead, using the right equipment, and staying adaptable, you can deliver a high-quality broadcast that resonates with your audience. Remote streaming offers endless opportunities for creativity and engagement—master these best practices, and you’re sure to stand out in the crowded streaming landscape.