Live streaming on Facebook has become a powerful tool for individuals, influencers, and businesses to connect with their audience in real time. Whether you’re sharing an important announcement, hosting a Q&A session, or showcasing a product launch, going live offers an authentic way to engage with your followers. In this guide, we’ll walk you through the essential steps to start live streaming on Facebook.
Why Live Stream on Facebook?
Facebook Live is a feature-rich tool that allows users to broadcast live videos to their audience. The key benefits of Facebook Live include:
- Real-Time Engagement: Interact with your audience as the live event happens.
- Wide Audience Reach: Facebook’s massive global user base ensures you can connect with people from across the world.
- Increased Algorithm Favorability: Facebook prioritizes live video content, increasing your chances of being seen by more people.
- Cost-Effective Marketing: Live streaming is budget-friendly and has the potential to drive high engagement.
What You Need to Get Started
To live stream on Facebook, make sure you have the following:
- A Facebook Account: You’ll need an active account on the platform.
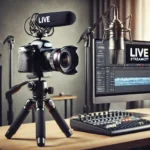
- A Reliable Device: A smartphone, tablet, laptop, or PC with a built-in or external camera.
- Stable Internet Connection: A minimum upload speed of 3 Mbps is recommended for seamless streaming.
- Content Plan: Outline your key message, talking points, and objectives for the live session.
- Quiet and Well-Lit Environment: Choose a location with minimal distractions and good lighting to ensure a clean video.
Step-by-Step Guide to Live Stream on Facebook
1. Open Facebook
Launch the Facebook app on your smartphone or visit facebook.com on your desktop. Ensure you’re logged into the account or Page you want to post from.
2. Navigate to the Live Option
On Mobile:
- Tap the “What’s on Your Mind?” field on your News Feed or timeline.
- Select the “Live Video” option from the menu at the bottom.
On Desktop:
- Navigate to your timeline or Page.
- Click on “Live Video” at the top of the post creation box.
3. Set Up Your Live Stream
Once you select the live option, a live broadcast setup screen will appear. Here’s what you can do:
- Add a Title and Description: Describe the purpose of your live stream to attract viewers. Be concise yet compelling.
- Choose Your Audience: Select the visibility settings — Public, Friends, or Specific Groups.
- Tag Friends and Add Location: Optionally, tag collaborators or add a location to enhance discoverability.
- Apply Filters and Effects: Add fun filters, frames, or themed effects to make your stream visually appealing.
4. Check Your Equipment & Orientation
- Test Audio and Video Quality: Ensure your camera is steady and that the microphone picks up sound clearly. You can use tripods or external mics for better results.
- Choose Portrait or Landscape Mode: Decide how you want the video to display, especially if you’re broadcasting for professional purposes.
5. Go Live!
When ready, click “Go Live” to start your stream. During the broadcast, keep the following in mind:
- Engage with Viewers: Respond to comments and call out audience members by name to create a sense of connection.
- Stick to Your Plan: Stay on-topic to maintain the audience’s interest.
- Use Visual Aids: Show props, share your screen (for desktop), or showcase products to keep the session interactive.
6. End the Livestream
Click on “Finish” when your live session is over. You’ll be prompted to save the video, which can be shared or reposted later on your profile or Page.
Tips to Maximize Viewership
Follow these tips to ensure your Facebook Live session reaches as many people as possible:
- Promote the Event: Announce your live stream ahead of time to build anticipation.
- Select the Right Time: Go live when your target audience is most active.
- Engage Before Ending: Encourage viewers to interact by answering polls, tagging friends, or sharing the live stream.
- Review Analytics: After the session, review your video insights to gauge performance and pinpoint areas for improvement.
Common Issues and Solutions
If you encounter problems during your Facebook Live stream, here are some quick fixes:
- Lagging Video: Check your internet speed and reduce background apps.
- Audio Issues: Switch to an external microphone or check for ambient noise.
- Low Viewer Count: Promote the live session more aggressively and use an engaging title.
Final Thoughts
Facebook Live is an excellent platform for building meaningful connections with your audience. By following the steps and leveraging advanced features, you can create high-quality live streams that resonate with your viewers. The key is to plan ahead, stay consistent, and interact authentically.
Start your Facebook Live journey today and watch your online presence grow exponentially!