Introduction
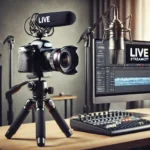
Achieving high-quality audio & video optimization is crucial for a professional live streaming experience. Poor sound quality can drive viewers away, regardless of how good the video looks. An audio mixer helps balance sound levels, reduce background noise, and create a polished production. This guide will walk you through the basics of audio mixers and how you can use them to enhance your live streams.
The Challenge: Managing Audio for Live Streams
When live streaming, inconsistent audio levels and background noise can significantly impact the viewer’s experience. Here are some common audio issues:
- Unbalanced volume levels: Different audio sources, such as microphones and background music, can vary in loudness.
- Background noise: Without proper filtering, unwanted noise can interfere with speech clarity.
- Audio lag: Poor synchronization between video and audio can create a disjointed viewing experience.
- Limited control: Built-in microphone settings on streaming platforms may not provide enough control over sound quality.
How an Audio Mixer Helps with Audio & Video Optimization
An audio mixer improves live streaming quality by allowing you to control multiple audio sources. Here’s how you can use an audio mixer effectively:
1. Choose the Right Mixer
Select a mixer that suits your needs based on these factors:
- Number of inputs: Determine how many microphones, instruments, or audio sources you’ll be using.
- Built-in effects: Some mixers include noise reduction and audio enhancement features.
- USB capability: Useful for direct digital connection to your streaming setup.
2. Set Up Your Mixer Correctly
Follow these steps to set up your audio mixer for live streaming:
- Connect your microphones and instruments. Use XLR or line inputs depending on your devices.
- Adjust gain levels. Start with low gain and increase as needed to avoid distortion.
- Balance audio sources. Use faders and EQ settings to blend sound smoothly.
- Test and monitor sound. Use headphones to check for pops, background noise, and balance.
3. Optimize Sound Quality
- Use compression: Reduces volume spikes for a steady output.
- Apply EQ adjustments: Enhance voice clarity and reduce unwanted frequencies.
- Eliminate background noise: Use noise gates or filters to reduce hiss.
4. Sync Audio with Video
To avoid audio lag:
- Test latency settings in your streaming software.
- Use an audio interface with low-latency processing.
- Adjust synchronizations within OBS or other streaming tools.
Benefits of Using an Audio Mixer for Live Streaming
Using an audio mixer provides multiple benefits, including:
- Consistent sound levels that keep your audio balanced and professional.
- Better audience engagement with clear and polished sound.
- Reduced technical issues like noise interference and volume fluctuations.
- Greater flexibility in managing multiple sound sources simultaneously.
Conclusion
Optimizing audio & video is essential for professional-quality live streaming. An audio mixer gives you precise control over sound, reduces noise, and helps create a polished production. By applying the right techniques, you can significantly enhance your stream’s audio quality.
Looking for the best mixers for your setup? Explore our recommended selection and elevate your live streaming today!