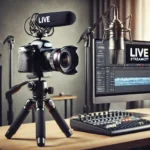
Open Broadcaster Software (OBS) is one of the most popular tools for live streaming. It’s free, open-source, and highly customizable, making it the go-to option for streamers on platforms like Twitch, YouTube, and Facebook Live. In this guide, we’ll walk you through the process of setting up OBS for live streaming, so you can provide high-quality content to your audience with ease.
Step 1: Download and Install OBS Studio
- Visit the official OBS website: Go to obsproject.com and download the version of OBS Studio compatible with your operating system (Windows, macOS, or Linux).
- Install the software: Follow the installation prompts to complete the setup. Once installed, launch OBS Studio.
Step 2: Configure Basic Settings
- Run the Auto-Configuration Wizard: When you open OBS Studio for the first time, it will offer to run the Auto-Configuration Wizard. Select “Optimize for streaming” if your main goal is live streaming. OBS will analyze your system and apply recommended settings.
- Check fundamental settings: Navigate to
File > Settingsto ensure these basic parameters are set correctly:- Language: Select your language preference.
- Theme: Choose your desired user interface appearance (e.g., Dark or Light).
Step 3: Set Up the Streaming Platform
- Choose your streaming service: In the settings menu, go to the “Stream” tab. Select your preferred platform under “Service,” such as Twitch, YouTube, or Facebook Live.
- Connect your account or stream key:
- For platforms like Twitch and YouTube, you can log in directly or paste your stream key, which you can find in your streaming platform’s dashboard.
Step 4: Configure Video and Audio Settings
- Set resolution and frame rate: Navigate to the “Video” tab in the settings menu to adjust these options:
- Base (Canvas) Resolution: Set to your monitor’s resolution (e.g., 1920×1080).
- Output (Scaled) Resolution: Lower this value (e.g., 1280×720) for smoother streaming if your internet speed or computer performance is limited.
- FPS (Frames Per Second): Use 30 or 60 depending on the type of content you’re streaming. Faster action demands higher frame rates.
- Select audio devices: In the “Audio” tab, choose your microphone and desktop audio sources. Make sure to test levels to avoid background noise or distortion.
Step 5: Add Sources and Scenes
- Create a new scene: Scenes in OBS represent what your viewers see. Create a new scene by clicking the “+” button in the “Scenes” panel.
- Add sources: Sources are the individual elements within a scene (e.g., video, images, etc.). Click the “+” button in the “Sources” panel to add sources like:
- Display Capture: Streams your entire screen.
- Window Capture: Streams a specific program or window.
- Video Capture Device: Adds your webcam feed.
- Audio Input Capture: Adds your microphone audio.
- Organize layers: Arrange your sources like layers in a photo editing program. Drag and drop them to ensure the correct visual hierarchy.
Step 6: Adjust Output Settings
- Set the bitrate: Go to the “Output” tab in the settings menu. Under the “Streaming” section, follow these recommended settings:
- Bitrate: Use 2500-4000 kbps for 720p streaming or 4000-6000 kbps for 1080p streaming.
- Encoder: Select “x264” (software encoding) or, if available, an NVENC encoder for better performance using a compatible GPU.
- Keyframe interval: Set this to 2 seconds, as most platforms recommend.
Step 7: Test Your Connection
- Conduct a bandwidth test: Use an online speed test to determine your upload speed. Ensure you have at least 5 Mbps upload as a baseline for 1080p streaming.
- Run a stream preview: In OBS, go to
Controls > Start Streaming(private or unlisted stream, if possible) to test your stream quality and troubleshoot any issues.
Step 8: Start Streaming
Once everything is set up and tested, click “Start Streaming” in the Controls panel. Your content will now be live on your selected platform. Remember to monitor chat and streaming health using OBS or the platform’s dashboard.
Tips for a Better Streaming Experience
- Use hotkeys: Configure hotkeys for quick scene transitions or muting your microphone.
- Manage CPU usage: Close unnecessary programs to improve performance.
- Add overlays: Enhance your stream with professionally designed overlays for branding and engagement.
- Engage with viewers: Respond to chats in real-time to build community.
By following these steps, you can set up OBS Studio for professional-grade live streaming. With a bit of experimentation and practice, you’ll be streaming like a pro in no time!